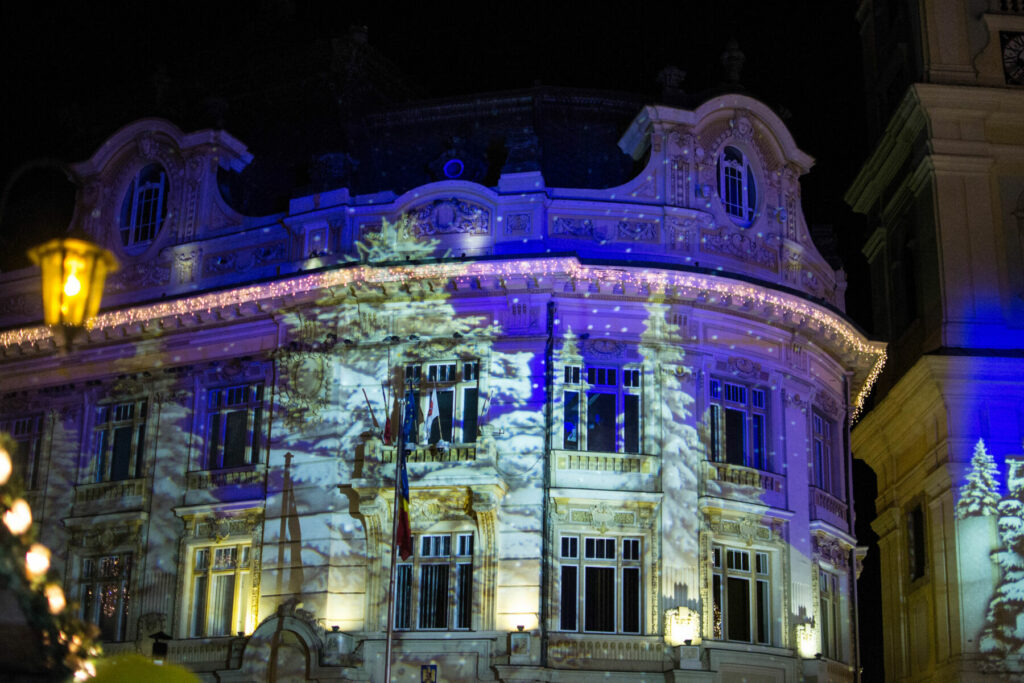
The Christmas season has given many a fun excuse to spruce up their homes and decorate to their heart’s desires. Sometimes, it becomes a bit of a neighborhood competition to outdo your neighbors or up your game from the previous year. Others, meanwhile, simply don’t have the time to think of a theme, buy or make decorations, and put them up before Christmas Day.
If you have a similar predicament, here’s an idea you can explore: Christmas projection mapping. It is a technologically advanced choice for decorating outside your home for the holidays, but it is much less labor-intensive. More importantly, there’s no need to spend days cleaning up and boxing decorations after Christmas.

Read on to learn more about house projection mapping and why it’s an excellent idea for the holidays or any occasion that begs for outdoor decorations.
How Does Projection Mapping Work?
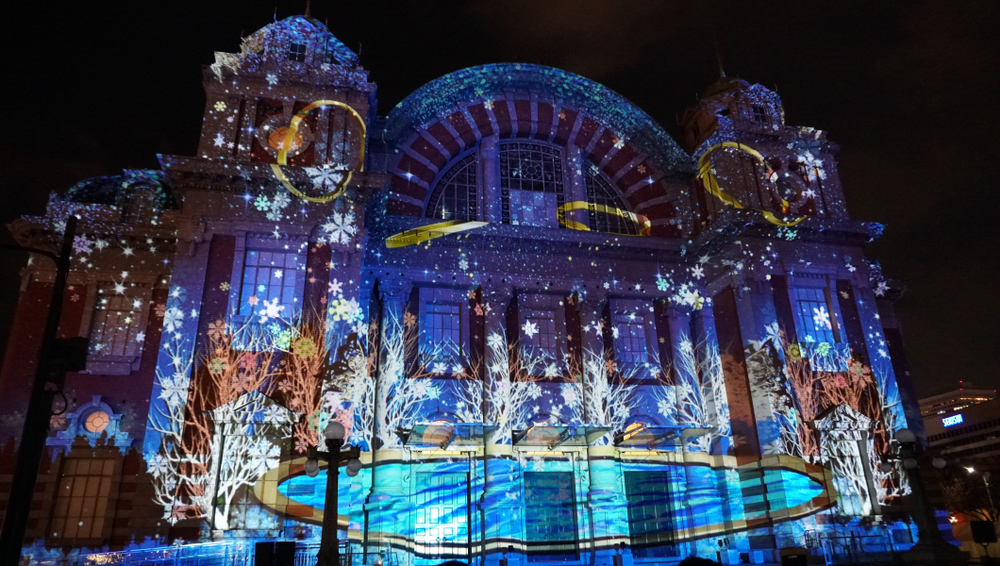
Projection mapping uses similar techniques and technology as your standard video projection, but it takes things up a notch. Instead of requiring a smooth, flat surface to project 3D visual content onto, projection mapping uses objects and structures as a screen to display images and videos, often with an accompanying audio track. Projection mapping technicians can utilize these surfaces’ different sizes, shapes, and depths to enhance a video show and create a more exciting and immersive 2D or 3D experience for audiences.
Projection mapping on structures has been used in many major campaigns and events. One example is the TRUEFEST music festival in Wales in 2018, where event organizers set up a remarkable show by doing projection mapping on a mansion’s façade. Most recently, Qatar did projection mapping on the façades of the UN General Assembly and Secretariat buildings and launched its “Scoring For The Goals” campaign to kick off the UN General Assembly Week and promote the FIFA World Cup.
House projection mapping uses the same concept but on a much smaller and more affordable scale.
Your Guide for Projection Mapping At Home
If you’re considering using a house mapping projector for an upcoming holiday or event, use this step-by-step guide as a reference.
Step 1: Choose Your Canvas
The most logical surface for Christmas projection mapping is the front of your house. However, if there are too many obstructions on your front lawn, or if the space out front is too limited to set up a projector at an acceptable distance, consider the side or back of your house instead.
Step 2: Scan or Photograph the Façade
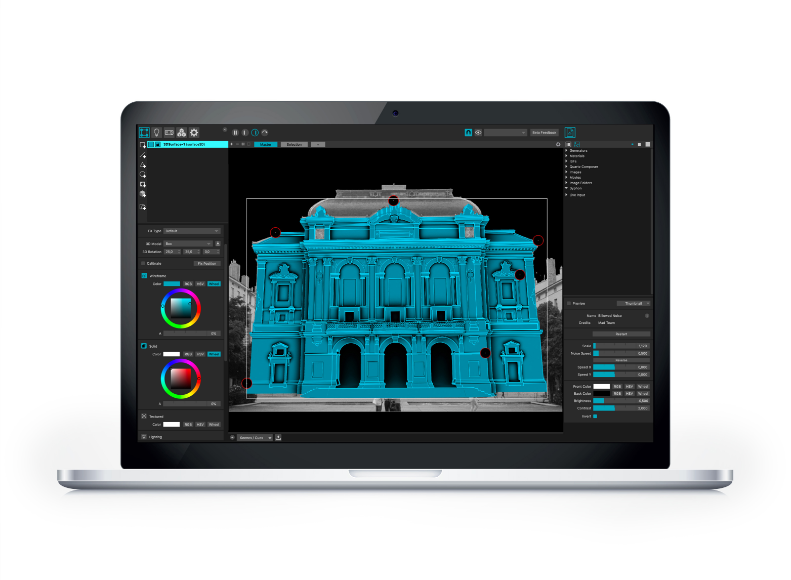
Once you’ve decided on your canvas or screen, you need to scan its entire façade. Laser scanning is ideal, but taking high-quality photographs from various angles will also do.
Step 3: Choose An Approach For Mapping
Before creating the guide or outline over which you’ll design your video content, you must first decide on a mapping methodology.
There are two common methods for this:
- Outline method
- Orthographic method
Outline Method
The outline method creates a scenario wherein the projector is fixed on one spot – directly in front and at the center of your house’s façade. This means you’ll design videos and animations from one point of view, which is that of the projector. In addition, this method is simpler because you’ll only need a full-frontal scan or photograph of your house to create the guide.
However, the outline method also has a disadvantage: moving the projector even just a little – like if a child or pet bumps into the device – can throw your video projection out of alignment. Moreover, if you want to cover a wider area and one projector is not enough, you’ll have to repeat the process for each additional house mapping projector you use.
Orthographic Method
The orthographic method is more meticulous and takes longer than the outline method. This approach generates a 3D rendering of the façade using scans or pictures taken from multiple angles. The scans and photos must be taken during the day without obstructions in the foreground, such as people or cars passing by.
It’s a lot of work, but the orthographic method will allow you to project your show from any angle. You won’t have to build a waterproof case for your projector or figure out how to keep it solidly fixed in one spot. Instead, you can set up your projectors wherever it is convenient or safe.
Step 4: Pick A Projection Mapping Software
Deciding your approach for projection mapping will also guide your choice of software. No doubt you’ll already have a piece of software in mind. Still, if you’re interested in seeing more choices, we previously published a blog about some of the best video mapping software programs available today. Check it out.

Step 5: Create Your Guide and Split It Into Sections
You have the scans and the software; now it’s time to start mapping. Generate a guide that will serve as the digital canvas for your video and animations. Start by outlining the outermost boundaries of the façade, then work your way inwards to the doors, windows, and pillars.
If you choose to do the orthographic mapping method, you’ll need to cut the guide into sections. The rule of thumb is to split surfaces that don’t belong on the same plane. So if you have pillars, balconies, or windows that are jutting out or recessed, or if an entire side of your home is a bit further back, split them. Then, map them separately so that your software will recognize them as independent sections where specific parts of the video should appear instead of being one continuous plane.
This is how you map parts of the video onto specific sections of your house. So, for example, regardless of where you set up your projector, the animations on the windows on your guide will also appear on your house windows. The same goes for all other sections that you mapped.
Step 6: Design and Create Video Animations
Once your guide is ready, you can begin designing your video show. You may use videos that you shot yourself or free-for-use animations from various sources. Design the video such that the effects and animation can maximize the entire “screen.” Utilize the different parts of your house to make a more significant impact with your storytelling.
For example, you can use the sections you cut in the previous step to design panels similar to a comic book. Alternatively, you can mix reality into your video effects, like making it seem like a flock of birds escaped from your chimney and then swooped back down into an open window on the first floor.
Let your creativity flow, and use animations or effects to aid your storytelling. Add audio tracks, too, for additional entertainment. If you don’t have time to think of a narrative, you can put together video clips and bits of animations, like Santa riding his sleigh across the first floor and then reappearing on the second floor. However, a video show with a plot or message will have a bigger impact on your audience.

Step 7: Prepare Your Home For Projection Mapping
With the video for your house projection done, the next step would be to test it. First, prepare your home so the video will register better on the façade. Here are some tips:
- Close the blinds or curtains on your windows.
- Consider adding a fresh coat of paint to your house’s exterior.
- Cover up materials that absorb or reflect light the wrong way.
- Remove anything that can stand between the projector and your home, as they will cast a shadow and disrupt your video projection.
- Add temporary, practical features that harmonize with your video projection, like a mechanism to open a window in time with what’s happening on your show. For example, Santa’s elf throwing out a rope to scale down the wall.
Step 8: Set Up Your Projector
After prepping your house for the show, you can set up your electric cables and projectors out front.
Recall that if you mapped your home following the outline method, you’d need a stable and fixed base on which you can mount a projector. While you can position your projectors anywhere if you do orthographic mapping, it’s still a good idea to build a mount or base where you can safely place your projector. Alternatively, use a table beneath a canopy.
How far should your projector be from your house? It depends on your projector lens’s throw ratio. Projector Central has a distance calculator tool that you can use. You can also do it manually by casting an image or a paused shot of your video projection, then moving your projector farther or nearer until the image fits the façade perfectly.
Step 9: Do A Test Run
Finally, you can do a test run of your house projection mapping and play the video from start to end. Check the effects’ timing and whether the video and audio are in sync. Also, look for things that need adjusting, like color grading, lighting, brightness, resolution, and lens angles.
These are the basic steps beginners interested in projection mapping at home can follow. As you master the process and discover more exciting effects and tricks, you’ll undoubtedly develop your own flow and techniques. For instance, you might incorporate light and laser effects into your next project.
Let Showtech Productions Help You Make This Christmas Better Than The Last
Unleash your creativity and impress neighbors and visitors this holiday season with projection mapping. However, if you want to test the waters first, you can rent video projection equipment instead of buying some immediately.
Showtech Productions can provide the technology you need, and if your interest goes beyond decorating your home, we offer our services in projection mapping. We elevate corporate and marketing events with our projection mapping, giving attendees one-of-a-kind experiences they will remember for a long time. So if you’re interested, contact Showtech Productions and request a proposal.

It looks really great, although it does seem that some surfaces can affect the overall effect of the projected images
I recently read your article regarding projection mapping. I enjoyed reading it. You pointed out a lot of things I’ll remember for a long time. Looking forward to reading your next article. Thank you. Keep posting stuff like this!
There are various Best projectors under 300. Additionally, But it is better to know the a to z about projectors.
If you are looking for an online image resizer, compressor, or converter, you must visit https://resizebuddy.com/. Although, it is free online web tool to resize your images.
train station name generator is a free online platform by GenoRandom.com that lets you generate the random names for station names with one click.
Premium 6000 x 6000 pixels converter for exact 6000×6000 dimensions. Ideal for e-commerce platforms, digital catalogs, and professional portfolios
ResizeClub is one of the best image resizing tools that helps you to Resize an image to a3 size for free. Try now
ResizeClub is one of the best image resizing tools that helps you to Resize an image to a3 size for free. Try now.
SlideShare Downloader is the best SlideShare downloader. It lets you download SlideShare in various formats, including ZIP, PDF, and IMAGE. You can download SlideShare to your phone, tablet, or PC with the highest quality.
Many local cash home buyers houston cash home buyers houston offer fast cash offers for homes in any condition, which is perfect for people who don’t want to wait for months on the market
One telecom tool that automates the process of dialing phone numbers for outgoing calls is auto dialer software. This program links successful callers to available agents by dialing numbers from a preloaded contact list rather than manually phoning each one.
https://ccscallcentersolution.blogspot.com/2025/01/auto-dialer-software-for-outbound-call.html
Pure Fortune est un site web dédié aux amateurs de jeux de hasard en ligne. Il propose des conseils, des stratégies et des revues détaillées sur les divers casinos et jeux disponibles. Les utilisateurs peuvent trouver des informations précieuses pour améliorer leurs chances de gagner et découvrir les dernières tendances dans le monde des jeux d’argent. Visitez le site pour plus d’informations:
https://purefortune.fr/
With Hopper Refer a Friend, you can earn rewards by sharing the app with your friends. When they sign up and complete their first booking, both of you will receive a special reward. It’s a great way to save on flights, hotels, and car rentals, all while helping your friends discover amazing travel deals. The more friends you refer, the more rewards you can earn! Start referring today and enjoy the benefits of the Hopper Refer a Friend program. It’s a win for you and your friends!
https://www.referralcode.app/invite/hopper-app
Unlike traditional resizing methods, pixelation preserves artistic integrity even when images are scaled up or down. image to pixel converter tool especially useful for digital artworks, where maintaining a specific pixel style is important
Web developers and designers use a 320×320 converter to maintain consistent image dimensions across grids, sliders, and carousels, enhancing the site’s visual appeal.
Découvrez des articles informatifs et fiables sur Takeinfo.fr, avec des sources vérifiées pour chaque publication. Restez informé avec des contenus précis et approfondis.
Why settle for just one emoji when you can blend two and express more? Whether you’re feeling 🐱 + 😂 or 🌮 + 😍, Emoji Kitchen lets you cook up the perfect emotion.
Unleash your imagination, mix and match, and send stickers that speak louder than words. Only on Gboard, your messages just got way more fun! 🎉📱
https://theemojikitchen.in/